So I've had several ideas for blog entries, actually remembered to bring my camera to class and loaded them on my computer and then they sat. Sigh. I tried. Well in the meantime I got a new laptop. Well it's my first laptop and huge update from the desktop my husband and I purchased our first Christmas after we were married back in 2002!! So... I've been living on my new addiction pintrest, as well as, starting work on my church's VBS, which I hope to share with you my adventure on that as well in the near future.
Well back to the subject at hand. I wanted to share some faves from these past few months!! First off one of my kid's FAVORITE charts in our room is our helping hands job chart!! They enjoy looking each day to see what job they will get to do that day. I used a die cut of a hand print and listed enough jobs for the number my class maxes at on. A few of those days were listed as Day Off the rest had the job title and a small hand drawn picture to resemble whatever that job is. I then had the poster laminated and added Velcro next to each hand print and then on each crayon cutout which indicates the child's name. This has also been a wonderful enforcement for name recognition plus helps build self-esteem knowing that they are a part of the class and that what they do matters.

I LOVE graphing with my 4's!! And they sure do love sharing things they love. I created a reusable graph on a plain white poster board and with a permanent marker drew out the basis for a bar graph. Then the poster was laminated for durability. I cut out squares to create responses, for this particular graph we did a "blind" taste test for different types of foods and we graphed if we liked the food or not. Red square construction paper was taped into the appropriate place. At the end we talked about what foods we liked the most which one we liked the least. This graph as worked out very well!!
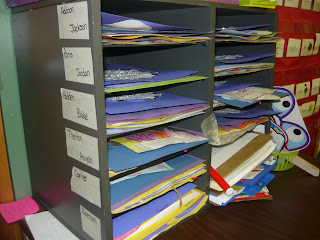
I just LOVE my system for keeping up with each child's memory book pages. I use a basic paper sort shelf I purchased at Sam's several years ago. Down one side I labeled each child's name indicating which slot was theirs. Once a page is completed for the memory book I punch the 3 holes in the side and place in child's slot. At the end of the year all I will need to do is bind the pages together with book rings and hand them out. This has worked out great for me.


No comments:
Post a Comment